iCloud Documents is a cloud storage and sync service provided by Apple, designed to allow users to easily store, access, and share their documents and files, and synchronize and share them across different Apple devices. I will detail this functionality in two articles. In this article, we will discuss how to integrate this feature into applications, perform file read and write operations, and respond to changes in file content.
In the beginning
Apple provides three main functionalities for developers based on CloudKit: CloudKit (for storing structured data), NSUbiquitousKeyValueStore (for storing key-value data), and iCloud Documents (for file sharing and cloud storage). I have previously written articles about the first two functionalities, but I have not found a good opportunity to delve into the iCloud Documents service. Recently, Xiaogd, the author of the well-known comic reader app KedaReader, shared his experience and questions related to iCloud Documents in a post on my Discord server. With his permission, I have written this article based on his post, combined with my own research and understanding. I would like to express my gratitude to Xiaogd.
This text is mainly written for non-document-based applications. Because document-based apps have deep integration with iCloud Documents, they can automatically implement most of the functionalities described in this text. If you are developing a document-based app, you can directly refer to the templates and sample codes provided by the system, and many of the contents in this text may be redundant for you.
How to enable iCloud Documents feature
To enable the iCloud Documents feature in your project, follow these steps:
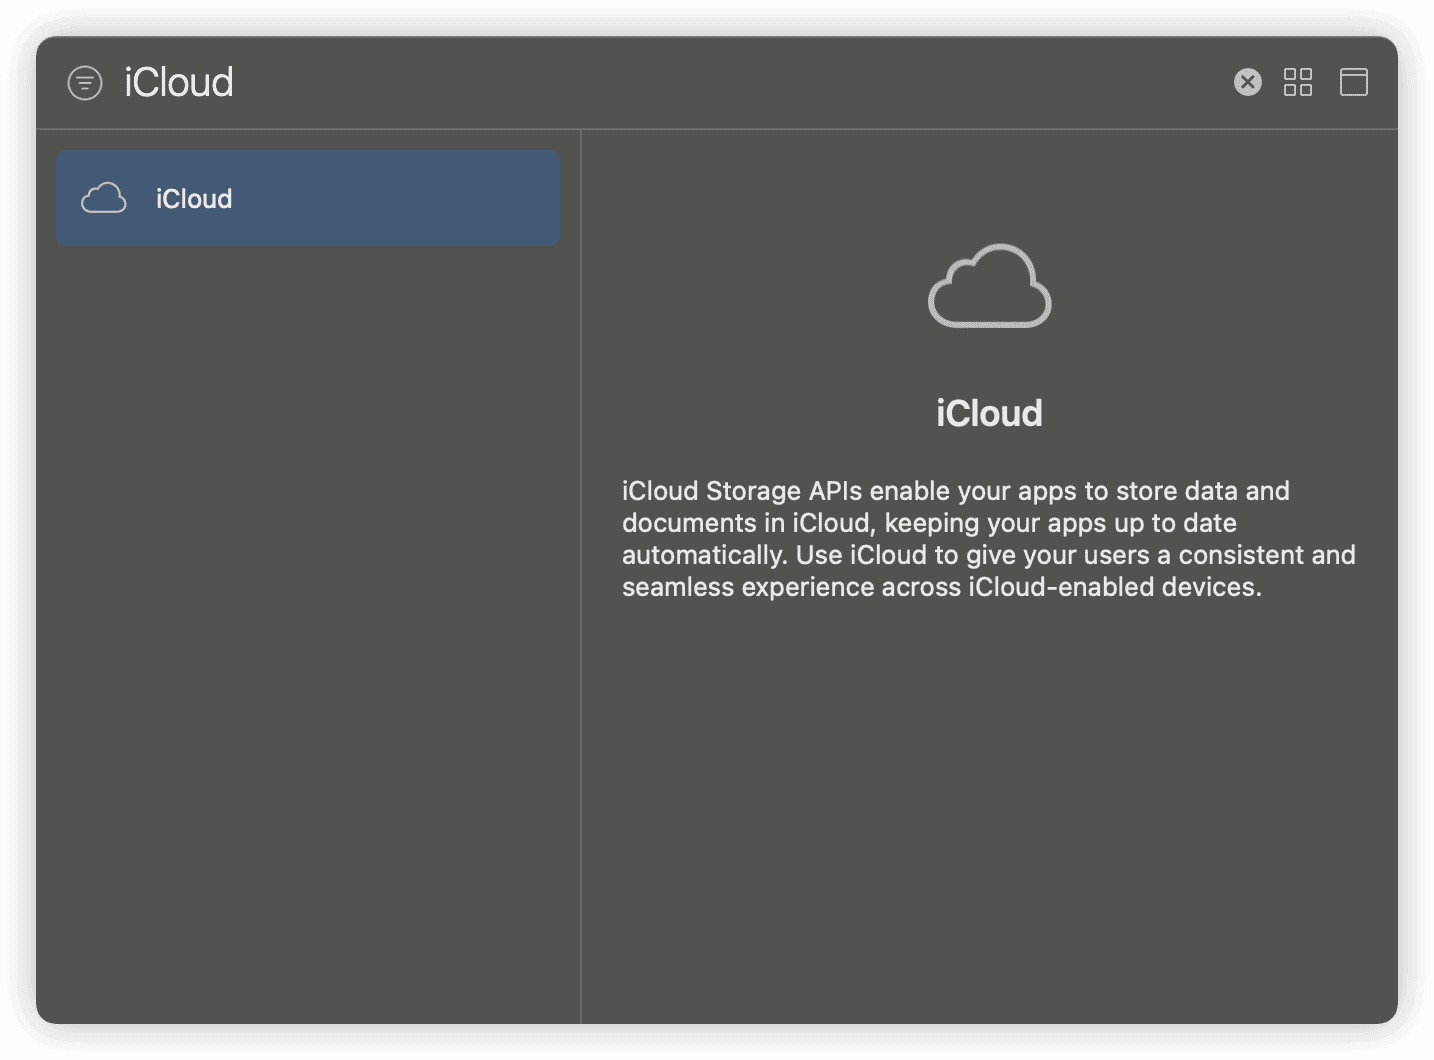
- In “Signing & Capabilities”, add the iCloud capability.

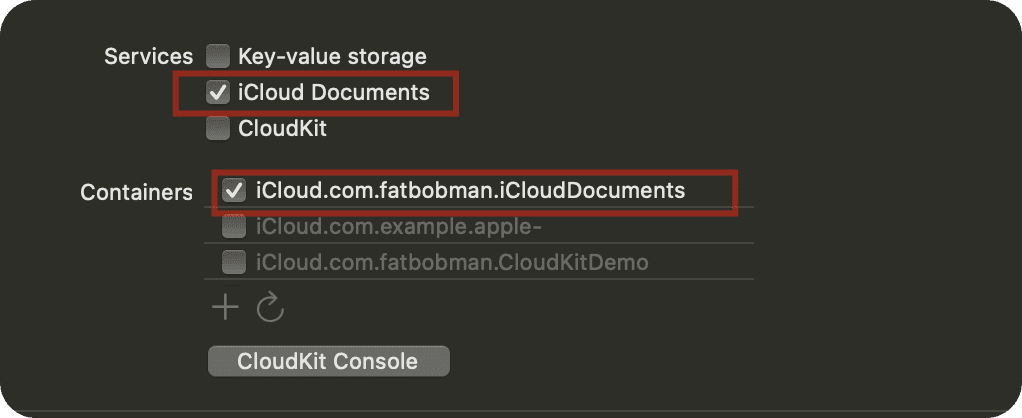
- Select the “iCloud Documents” feature and create or select the CloudKit container you want to use.

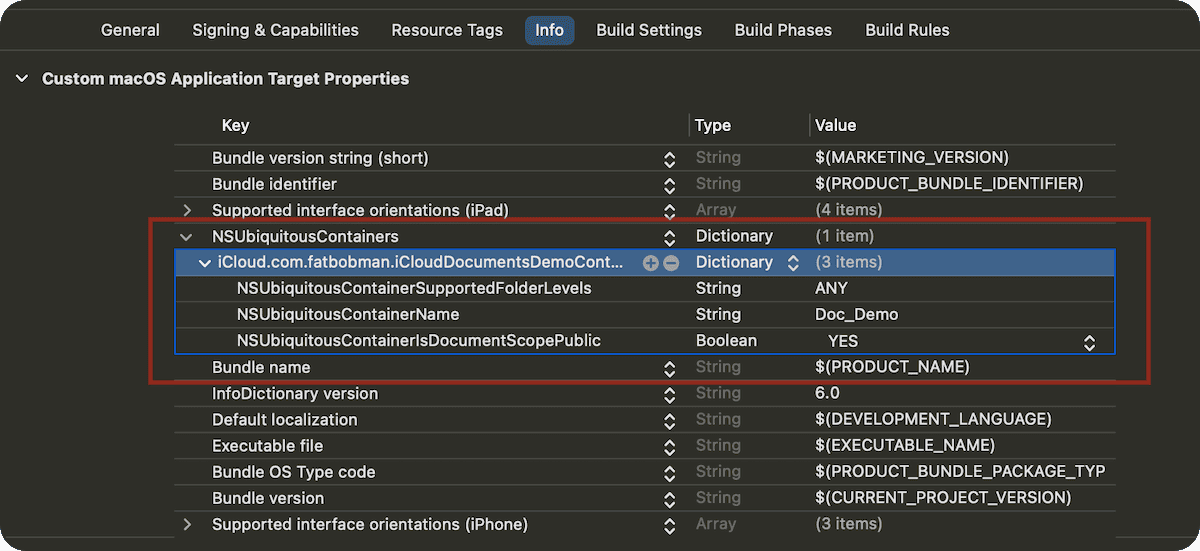
- In Info, add the following content:

<dict>
	<key>NSUbiquitousContainers</key>
	<dict>
		<key>iCloud.com.fatbobman.iCloudDocumentsDemoContainer</key>
		<dict>
			<key>NSUbiquitousContainerIsDocumentScopePublic</key>
			<true/>
			<key>NSUbiquitousContainerName</key>
			<string>Doc_Demo</string>
			<key>NSUbiquitousContainerSupportedFolderLevels</key>
			<string>ANY</string>
		</dict>
	</dict>
</dict>NSUbiquitousContainers: A dictionary that specifies the iCloud Drive settings for each container. The keys of this dictionary are the container identifiers of your application’s iCloud containers. For example, in the above example, we used the container iCloud.com.fatbobman.iCloudDocumentsDemoContainer in the project settings, so we need to create a dictionary with that id as the key.
NSUbiquitousContainerIsDocumentScopePublic: When this key is set to YES, it means that the document scope in the container is public. Users can see the contents of the document directories in the iCloud Documents directory in the Files app (iOS) or Finder (macOS). Only the contents saved in the Documents directory in iCloud Documents will be displayed by the operating system.
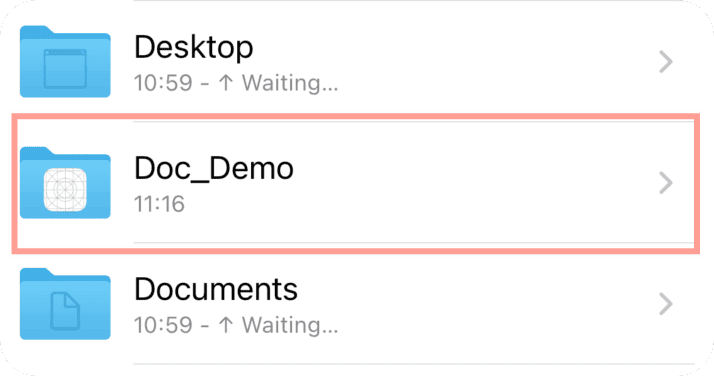
NSUbiquitousContainerName: This is the friendly name of the container that users see in iCloud Drive. This name is used as the iCloud folder name displayed in Finder or the Files app. In the above configuration, we set it to Doc_Demo, and then we will see a directory named Doc_Demo in the iCloud Drive of Finder.
NSUbiquitousContainerSupportedFolderLevels: This configuration determines the folder hierarchy that the app can create in iCloud Drive. Common values are None (does not allow creating subfolders), One (allows one level of subfolders), and Any (allows any level of subfolders).
After creating or modifying the Info settings, you should increase the build number of the current project to ensure that the modified configuration takes effect.
How to Get the URL of the iCloud Documents Folder
You can obtain the URL of the iCloud Documents folder using the following code:
// CloudKit Container ID
let containerIdentifier = "iCloud.com.fatbobman.iCloudDocumentsDemoContainer"
guard let url = FileManager.default.url(forUbiquityContainerIdentifier: containerIdentifier) else {
    print("Can't get UbiquityContainer url")
    return
}

print(url)
The following situations may cause the inability to retrieve the URL:
- Incorrect settings or failure to add the build number in Info.
- Not logged into iCloud account.
- Logged into iCloud account, but disabled iCloud sync function for the current application in the system’s iCloud settings.
Why can’t I see my folder in Files app and Finder?
If you are able to access the URL of the iCloud Documents folder but still can’t see the iCloud Documents directory for your current project in the Files app or Finder, it could be due to the following reasons:
- Make sure
NSUbiquitousContainerIsDocumentScopePublicis set toYES. - Try increasing the builder number and run again.
- Write a file in the Documents subdirectory of the iCloud Documents directory.
After adding iCloud Documents functionality to your project for the first time, sometimes you need to create a file in the Documents in order to see the directory in the Files app or Finder. You can try using the following code to write a file:
let containerIdentifier = "iCloud.com.fatbobman.iCloudDocumentsDemoContainer"
guard let containerURL = FileManager.default.url(forUbiquityContainerIdentifier: containerIdentifier) else {
    print("Can't get UbiquityContainer url")
    return
}

let fileURL = containerURL.appendingPathComponent("Documents").appendingPathComponent("hello.txt")
try! "hello world".write(to: fileURL, atomically: true, encoding: .utf8)- Ensure normal iCloud sync status of the simulator
Please note that in some cases, even if you have signed in to your iCloud account on the iOS simulator, iCloud documents sync may still be unstable, especially in iOS 17 system, this situation is more common. When encountering similar situations, please try multiple times or switch to a new simulator environment.
After completing the above operations, you will be able to see the Doc_Demo directory and hello.txt file created by the current application in the Files app or Finder.

When the Documents subdirectory of iCloud Documents is displayed, the directory will continue to be shown even if we delete all the contents of the Documents directory.
Do you need to save all files in the Documents subdirectory of iCloud Documents?
It depends on the situation.
For files that you want to display in the Files app or Finder, save them in the “Documents” subdirectory.
If you don’t think it’s necessary to show the files to the user, you can directly set NSUbiquitousContainerIsDocumentScopePublic to NO. This setting will not affect the synchronization of the iCloud Documents directory between different devices.
Who can read and write the files under iCloud Documents
- Other applications using the same developer account and the same NSUbiquitousContainers configuration
- Files app and Finder (can read and write the Documents subdirectory)
How to Perform File Operations in iCloud Documents
Although in the previous text, we created a hello.txt file in the Documents subdirectory using the same method as writing to a regular file, this does not mean that it is the correct operation mode for the iCloud Documents directory.
For iCloud Documents, Apple recommends developers to perform file operations using NSFileCoordinator. This is because, besides the current project, other eligible apps and system apps can also read and write content in the iCloud Documents directory. NSFileCoordinator ensures that multiple access requests to the file system are properly coordinated to avoid data conflicts and data corruption.
Therefore, the majority of file operations on iCloud Document should be done through NSFileCoordinator.
To avoid impacting the main thread, these operations are typically performed in the background.
It should be noted that the coordination tasks and file access tasks of NSFileCoordinator should be completed in the same execution context (the same thread) to ensure the atomicity and consistency of file access.
Write File
The safe way to write files is:
actor CloudDocumentsHandler {
    let coordinator = NSFileCoordinator()

    func write(targetURL: URL, data: Data) throws {
        var coordinationError: NSError?
        var writeError: Error?

        // Use the coordinationError variable to capture the error information of the coordinate method.
        // If an NSError pointer is not provided, errors occurring during the coordination process will not be caught and handled.
        coordinator.coordinate(writingItemAt: targetURL, options: [.forDeleting], error: &coordinationError) { url in
            do {
                try data.write(to: url, options: .atomic)
            } catch {
                writeError = error
            }
        }

        // Check outside the closure to see if an error occurred
        if let error = writeError {
            throw error
        }

        // Check if an error occurred during reconciliation
        if let coordinationError = coordinationError {
            throw coordinationError
        }
    }
}

Task.detached {
    let containerIdentifier = "iCloud.com.fatbobman.iCloudDocumentsDemoContainer"
    guard let containerURL = FileManager.default.url(forUbiquityContainerIdentifier: containerIdentifier) else {
        print("Can't get UbiquityContainer url")
        return
    }
    let documentsFolderURL = containerURL.appendingPathComponent("Documents33")
    let fileURL = documentsFolderURL.appending(path: "hello.txt")
    let hander = CloudDocumentsHandler()
    do {
        try await hander.write(targetURL: fileURL, data: "hello world".data(using: .utf8)!)
    } catch {
        print(error)
    }
}
When we call the coordinator.coordinate(writingItemAt: targetURL, options: [], error: &coordinationError) method, NSFileCoordinator will create a temporary URL for the targetURL if necessary (not always), and it will prevent other processes or threads using NSFileCoordinator from writing to the same file during the coordination block.
When additional control is needed, you can add the desired options in the options parameter. These options provide contextual information about the nature of the operation, helping NSFileCoordinator to handle concurrency and conflict issues more efficiently.
Read File
actor CloudDocumentsHandler {
    let coordinator = NSFileCoordinator()

    ....

    func read(url: URL) throws -> Data {
        var coordinationError: NSError?
        var readData: Data?
        var readError: Error?

        coordinator.coordinate(readingItemAt: url, options: [], error: &coordinationError) { url in
            do {
                readData = try Data(contentsOf: url)
            } catch {
                readError = error
            }
        }

        if let error = readError {
            throw error
        }

        if let coordinationError = coordinationError {
            throw coordinationError
        }

        // Make sure the data read is not empty
        guard let data = readData else {
            throw NSError(domain: "CloudDocumentsHandlerError", code: 0, userInfo: [NSLocalizedDescriptionKey: "No data was read from the file."])
        }

        return data
    }
}
How to detect changes in a file
In the code above, we use read(url: URL) to retrieve the data of the specified file. If the file is modified by other processes or devices on the network, how can developers detect its changes and update it in a timely manner?
Usually, for individual file changes, we can use NSFilePresenter to detect the changes.
The main functions of NSFilePresenter include:
- Receiving file change notifications: When a file changes (such as its content being modified, moved, or deleted), objects that implement the
NSFilePresenterprotocol will receive notifications. - Handling file conflicts: If multiple apps or processes attempt to modify the same file simultaneously,
NSFilePresentercan help identify and resolve conflicts. - Coordinating file save operations: Before a file is saved, you can notify
NSFilePresenterto allow it to perform necessary operations, such as saving the current state or releasing file locks.
First, we need to declare a type that conforms to the NSFilePresenter protocol:
class FilePresenter: NSObject, NSFilePresenter {
    let fileURL: URL
    var presentedItemOperationQueue: OperationQueue = .main

    init(fileURL: URL) {
        self.fileURL = fileURL
        super.init()
        // Register to monitor the specified URL
        NSFileCoordinator.addFilePresenter(self)
    }

    deinit {
        // remove monitor
        NSFileCoordinator.removeFilePresenter(self)
    }

    var presentedItemURL: URL? {
        return fileURL
    }

    func presentedItemDidChange() {
        // When files change, perform relevant operations
        // For example, reload a file or notify other components
        print("file changed")
    }
}
Then, add methods to enable and disable monitoring for CloudDocumentsHandler:
actor CloudDocumentsHandler {
    let coordinator = NSFileCoordinator()
    var filePresenters: [URL: FilePresenter] = [:]

    ....

    func startMonitoringFile(at url: URL) {
        let presenter = FilePresenter(fileURL: url)
        filePresenters[url] = presenter
    }

    func stopMonitoringFile(at url: URL) {
        if let presenter = filePresenters[url] {
            NSFileCoordinator.removeFilePresenter(presenter)
        }
        filePresenters[url] = nil
    }
}
This way, we can use the startMonitoringFile method to detect file changes after reading the file.
let data = try await hander.read(url: fileURL)
await hander.startMonitoringFile(at: fileURL)
// close monitor
await hander.stopMonitoringFile(at: fileURL)
Points to note:
presentedItemDidChangedoes not inform us about the specific changes to a file. When more precise handling of file conflicts and coordinated saving operations is required, it is necessary to implement other methods of theNSFilePresenterprotocol.- When monitoring of a file is no longer needed, it is important to promptly remove the instance of
NSFilePresenterto improve efficiency and avoid memory leaks.
NSFilePresenter can not only monitor individual files but also entire directories. However, due to the limited information it provides, we generally do not use it to monitor a directory unless we only need notifications when the contents of the directory change.
How to retrieve a file list from the iCloud Document directory
So, how can we retrieve a file list from the iCloud Document directory and achieve automatic updates when the content changes?
Apple suggests using NSMetaDataQuery.
In projects that use iCloud Documents, NSMetadataQuery serves as a tool to search Spotlight metadata and can be used to monitor file changes in the iCloud document directory. It allows developers to set specific query conditions to monitor file additions, deletions, or modifications. When these changes are detected in the file system, NSMetadataQuery sends notifications, enabling developers to promptly update the application interface or perform corresponding logical operations. This functionality is particularly important in handling file synchronization and status updates.
If you have experience with Core Data, it behaves somewhat similar to NSFetchedResultsController or @FetchRequest.
The code below will use NSMetadataQuery to create an AsyncStream based on the given Predicate, Scope, and SortDescriptor. It will return a file list from the specified location and respond to its changes.
class ItemQuery {
    let query = NSMetadataQuery()
    let queue: OperationQueue

    init(queue: OperationQueue = .main) {
        self.queue = queue
    }

    func searchMetadataItems(
        predicate: NSPredicate? = nil,
        sortDescriptors: [NSSortDescriptor] = [],
        scopes: [Any] = [NSMetadataQueryUbiquitousDocumentsScope]
    ) -> AsyncStream<[MetadataItemWrapper]> {
        query.searchScopes = scopes
        query.sortDescriptors = sortDescriptors
        // Get iCloud Ubiquity Container URL
        if let containerURL = FileManager.default.url(forUbiquityContainerIdentifier: nil)?.appendingPathComponent("Documents") {
            // Build a path to the Documents directory
            let documentsPath = containerURL.path

            // Create predicates using dynamic paths
            let defaultPredicate = NSPredicate(format: "%K BEGINSWITH %@", NSMetadataItemPathKey, documentsPath)
            query.predicate = predicate ?? defaultPredicate
        } else {
            // If the path cannot be obtained, a suitable default behavior can be selected
            query.predicate = predicate ?? NSPredicate(value: true)
        }

        return AsyncStream { continuation in
            NotificationCenter.default.addObserver(
                forName: .NSMetadataQueryDidFinishGathering,
                object: query,
                queue: queue
            ) { _ in
                let result = self.query.results.compactMap { item -> MetadataItemWrapper? in
                    guard let metadataItem = item as? NSMetadataItem else {
                        return nil
                    }
                    return MetadataItemWrapper(metadataItem: metadataItem)
                }
                continuation.yield(result)
            }

            NotificationCenter.default.addObserver(
                forName: .NSMetadataQueryDidUpdate,
                object: query,
                queue: queue
            ) { _ in
                let result = self.query.results.compactMap { item -> MetadataItemWrapper? in
                    guard let metadataItem = item as? NSMetadataItem else {
                        return nil
                    }
                    return MetadataItemWrapper(metadataItem: metadataItem)
                }
                continuation.yield(result)
            }

            query.start()

            continuation.onTermination = { @Sendable _ in
                self.query.stop()
                NotificationCenter.default.removeObserver(self, name: .NSMetadataQueryDidFinishGathering, object: self.query)
                NotificationCenter.default.removeObserver(self, name: .NSMetadataQueryDidUpdate, object: self.query)
            }
        }
    }
}

struct MetadataItemWrapper: Sendable {
    let fileName: String?
    let fileSize: Int?
    let contentType: String?
    let isPlaceholder: Bool
    let isDownloading: Bool
    let downloadAmount: Double?
    let isDirectory: Bool
    let isUploaded: Bool

    init(metadataItem: NSMetadataItem) {
        fileName = metadataItem.value(forAttribute: NSMetadataItemFSNameKey) as? String
        fileSize = metadataItem.value(forAttribute: NSMetadataItemFSSizeKey) as? Int
        contentType = metadataItem.value(forAttribute: NSMetadataItemContentTypeKey) as? String

        // Is it a placeholder file
        isPlaceholder = metadataItem.value(forAttribute: NSMetadataUbiquitousItemDownloadingStatusKey) as? Bool ?? false

        // download amout
        downloadAmount = metadataItem.value(forAttribute: NSMetadataUbiquitousItemPercentDownloadedKey) as? Double

        // Is downloading
        let downloadStatus = metadataItem.value(forAttribute: NSMetadataUbiquitousItemIsDownloadingKey) as? String
        isDownloading = downloadStatus == NSMetadataUbiquitousItemDownloadingStatusCurrent

        // Check if it is a directory
        if let contentType = metadataItem.value(forAttribute: NSMetadataItemContentTypeKey) as? String {
            isDirectory = (contentType == "public.folder")
        } else {
            isDirectory = false
        }

        // Check whether the file has been uploaded successfully or saved in the cloud
        let uploaded = metadataItem.value(forAttribute: NSMetadataUbiquitousItemIsUploadedKey) as? Bool ?? false
        let uploading = metadataItem.value(forAttribute: NSMetadataUbiquitousItemIsUploadingKey) as? Bool ?? true
        isUploaded = uploaded && !uploading
    }
}
The following code demonstrates how to retrieve a list of files in the Document directory under iCloud Documents, including all subdirectories and files within subdirectories, and automatically update to reflect any changes.
Task {
    let query = ItemQuery()
    for await items in query.searchMetadataItems().throttle(for: .seconds(1), latest: true) {
        items.forEach{
            print($0.fileName ?? "", $0.isDirectory)
        }
    }
}
To avoid frequent notifications from NSMetadataQuery, the throttle method from swift-async-algorithms is used in the above code for rate limiting. You can implement the above logic using any familiar method (such as Combine) according to your own needs.
The logic of the code is relatively simple:
- Create a query and set the Predicate, Scope, and SortDescriptors.
- Register for NSMetadataQueryDidFinishGathering and NSMetadataQueryDidUpdate notifications.
- When there is a notification, convert NSMetadataItem to MetadataItemWrapper (convert to Sendable) and pass it through AsyncStream.
Scope is used to set the search range. In iCloud Document applications, we usually use:
- NSMetadataQueryUbiquitousDocumentsScope: Search in the Documents subdirectory of iCloud Documents.
- NSMetadataQueryUbiquitousDataScope: Search in the iCloud Documents directory, excluding the Documents subdirectory.
In addition to specifying a specific directory, Predicate can also be used to search for specific files. The following code will list all files and directories starting with the character h, but only within the iCloud Documents root directory.
guard let containerURL = FileManager.default.url(forUbiquityContainerIdentifier: containerIdentifier) else {
    return
}
let predicateFormat = "((%K BEGINSWITH[cd] 'h') AND (%K BEGINSWITH %@)) AND (%K.pathComponents.@count == %d)"
// Control the directory depth through the number of pathComponents
let predicate = NSPredicate(format: predicateFormat,
                            NSMetadataItemFSNameKey,
                            NSMetadataItemPathKey,
                            containerURL.path,
                            NSMetadataItemPathKey,
                            containerURL.pathComponents.count + 1)
for await items in query.searchMetadataItems(predicate: predicate, scopes: [NSMetadataQueryUbiquitousDataScope]).throttle(for: .seconds(1), latest: true) {
    items.forEach {
        print($0.fileName ?? "", $0.isDirectory)
    }
}
You can also use sortDescriptors to set the sorting criteria for the returned results, for example: sorting by file name in ascending order, and then sorting by file size in descending order.
let sortDescriptors = [
    NSSortDescriptor(key: NSMetadataItemFSNameKey, ascending: true),
    NSSortDescriptor(key: NSMetadataItemFSSizeKey, ascending: false)
]
When using NSMetadataQuery, developers should be aware of the following:
NSMetadataQueryis a tool for searching Spotlight metadata, not for directly manipulating files.- When creating predicates, developers should not rely on traditional file system paths and logic, but should use predicates that match the metadata to filter data.
NSMetadataQueryresponds to any changes in metadata that satisfy the predicate. Developers should provide predicates that are as accurate as possible according to their needs. This helps reduce unnecessary change notifications and improves efficiency.- If the change response is too frequent, appropriate rate limiting measures should be taken.
NSMetadataQueryshould be closed as soon as it is no longer needed to release resources and improve performance.
What’s next
In this article, we discussed how to integrate iCloud document functionality into a project, including reading and writing files, retrieving a list of files, and responding to changes in file or directory contents. In the next article, we will delve into more details about techniques such as placeholder files, downloading and space cleaning, and moving and renaming.
You can find the source code for this article here.