With Apple’s continued investment in iPadOS, more and more developers are hoping their apps can perform better on the iPad. Especially when users enable the Stage Manager feature, the compatibility of apps with different visual size modes becomes more important. This article will discuss how to create a programmatically adaptive navigation solution for different size modes.
This article shows how to create an adaptive navigation for different size modes in SwiftUI, with a focus on iPadOS apps and the Stage Manager feature.

Programmatic Navigation and State-Driven Navigation
As the name suggests, “programmatic navigation” allows developers to perceive the current navigation state of the application through code and set navigation targets. Starting from version 4.0, Apple has greatly enhanced the limited programmatic navigation capability of SwiftUI by introducing NavigationStack and NavigationSplitView. Developers can now have full control over the navigation state of the application and can implement navigation at any location in the code inside or outside the view.
Unlike the imperative navigation used in UIKit, SwiftUI, as a declarative framework, perceives and sets the relationship between the two. Reading the state reveals the current navigation position, and changing the state adjusts the navigation path. Therefore, in SwiftUI, mastering the difference in state representation between the two navigation containers is the key to implementing an adaptive navigation solution.
NavigationStack vs NavigationSplitView
This section only explains the state representation between NavigationStack and NavigationSplitView. For specific usage of the two, please refer to the article “A New Navigation System in SwiftUI 4.0”.
Consistent with the visual representation, NavigationStack uses a “stack” as the navigation state representation. It uses an array (NavigationPath is also a wrapper for Hashable arrays) as the form of state representation. The process of pushing and popping data in the stack corresponds to adding and removing views in the navigation container. Popping all data is equivalent to returning to the root view, and pushing multiple data is equivalent to adding multiple views at once and directly jumping to the last view represented by the data. It should be noted that in NavigationStack, the root view is directly declared in the code and does not exist in the “stack.”
We can view NavigationSplitView as an HStack with some preset capabilities, which can create a two-column or three-column navigation interface by declaring two or three views in it. In many cases, the state representation between NavigationSplitView and HStack with multiple views is very similar. However, due to some features of NavigationSplitView, there are more requirements and restrictions on the state representation:
-
It can automatically convert to the visual state of NavigationStack when needed (on iPhone or in compact mode).
For some simple two-column or three-column navigation layouts, SwiftUI can automatically convert them into the NavigationStack presentation form. Scheme 1 and Scheme 2 in the following text demonstrate this ability. However, not all state representations can achieve programmatic navigation after conversion.
-
It is deeply bound to List.
For a NavigationSplitView containing three columns (A, B, and C), we can use any method to create a linkage between these views. For example, modifying state b in A will cause B to respond to state b; modifying state c in B will cause C to respond to state c. However, only when the state is modified through
List(selection:)in the first two columns, can the automatically converted NavigationStack presentation form have programmatic navigation capabilities. Scheme 1 further explains this. -
NavigationStack can be further embedded in columns.
We can embed NavigationStack in any column of NavigationSplitView to achieve more complex navigation mechanisms. However, in this case, automatic conversion cannot handle such scenarios. Developers need to convert between the two navigation logic states on their own. Scheme 3 will demonstrate how to do this.
Most user-friendly solution - NavigationSplitView + List

struct ThreeColumnsView: View {
    @StateObject var store = ThreeStore()
    @State var visible = NavigationSplitViewVisibility.all
    var body: some View {
        VStack {
            NavigationSplitView(columnVisibility: $visible, sidebar: {
                List(selection: Binding<Int?>(get: { store.contentID }, set: {
                    store.contentID = $0
                    store.detailID = nil
                })) {
                    ForEach(0..<100) { i in
                        Text("SideBar \(i)")
                    }
                }
                .id(store.deselectSeed)
            }, content: {
                List(selection: $store.detailID) {
                    if let contentID = store.contentID {
                        ForEach(0..<100) { i in
                            Text("\(contentID):\(i)")
                        }
                    }
                }
                .overlay {
                    if store.contentID == nil {
                        Text("Empty")
                    }
                }
            }, detail: {
                if let detailID = store.detailID {
                    Text("\(detailID)")
                } else {
                    Text("Empty")
                }
            })
            .navigationSplitViewStyle(.balanced)
            HStack {
                Button("Back Root") {
                    store.backRoot()
                }
                Button("Back Parent") {
                    store.backParent()
                }
            }
            .buttonStyle(.bordered)
        }
    }
}

class ThreeStore: ObservableObject {
    @Published var contentID: Int?
    @Published var detailID: Int?
    @Published var deselectSeed = 0

    func backParent() {
        if detailID != nil {
            detailID = nil
        } else if contentID != nil {
            contentID = nil
        }
    }

    func backRoot() {
        detailID = nil
        contentID = nil
        //Improve the performance after returning to the root directory in compact mode. Uncheck highlight
        //A similar method can be used to improve the problem that the content column will still have a gray selection prompt after the contentID changes.
        DispatchQueue.main.asyncAfter(deadline: .now() + 0.1) {
            withAnimation {
                self.deselectSeed += 1
            }
        }
    }
}
The code is very simple, and I only have a few reminders:
- The List must appear at the top level of the column code.
In order to ensure that it still has the ability of programmatic navigation after automatic conversion, NavigationSplitView has strict requirements for embedded Lists. The List code must appear at the top level of the column code. For example, in the Content column code of this example, in order to maintain this limitation, only a placeholder view can be defined through overlay. If the code is adjusted to the following style, it will lose the ability of programmatic navigation after conversion (cannot return to the upper level view by modifying the status).
if store.detailID != nil {
    List(selection: $store.detailID)
} else {
    Text("Empty")
}- After modifying the status, the List will still display the previously selected item in gray.
Even if the status is cancelled (e.g. modifying contentID), the List will still display the previously selected status in a gray checkbox. To avoid confusion for users, two ID decorators were used in the code to refresh the column view after the status changed.
Gain something, lose something —— NavigationSplitView + LazyVStack
Although List is easy to use, there are some drawbacks, the most important of which is the inability to customize the selected state. So, can we use VStack or LazyVStack in the navigation bar to achieve programmatic navigation?
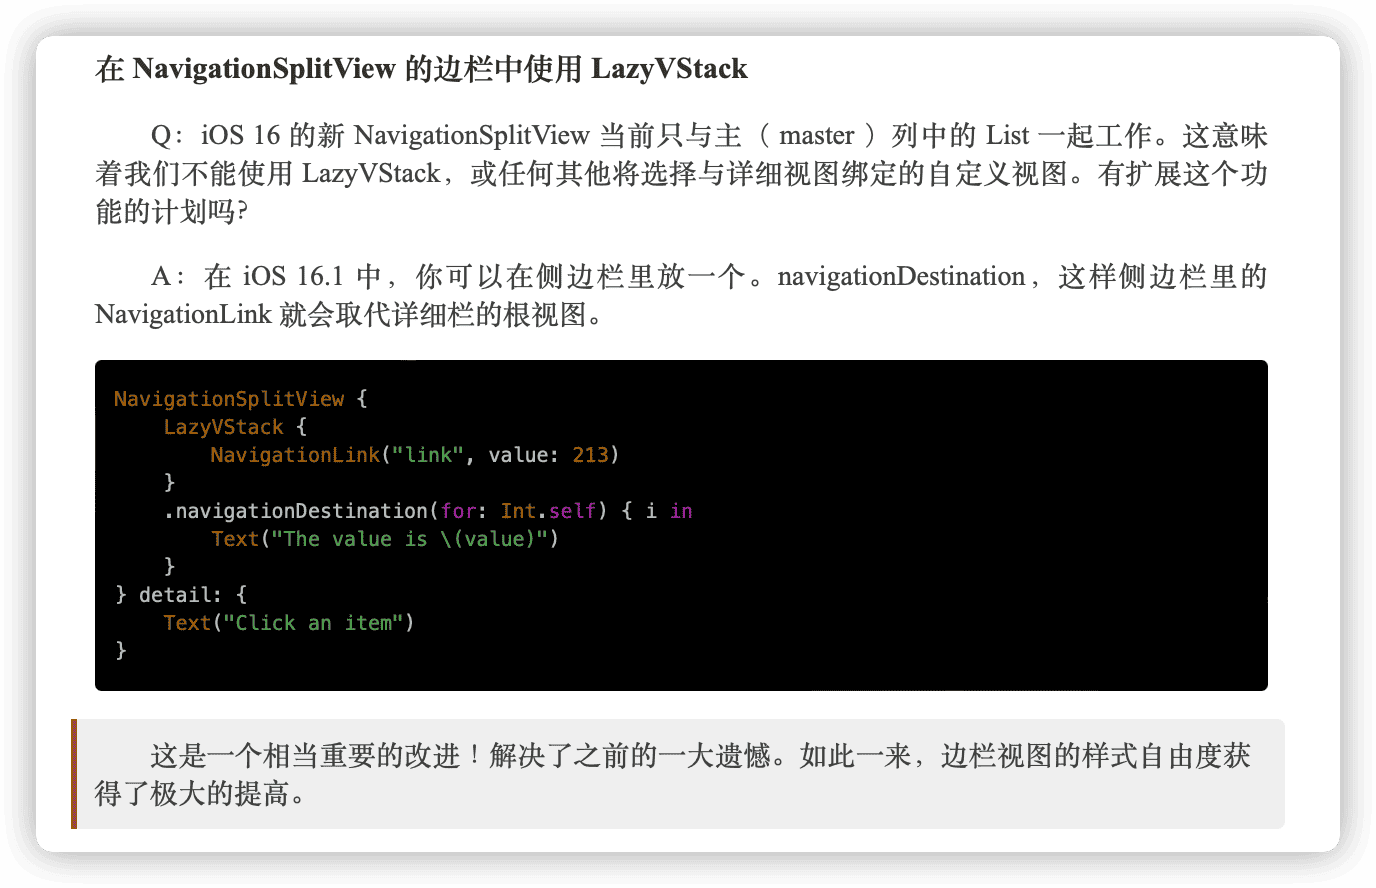
In a recent Ask Apple session, Apple engineers introduced the following method:

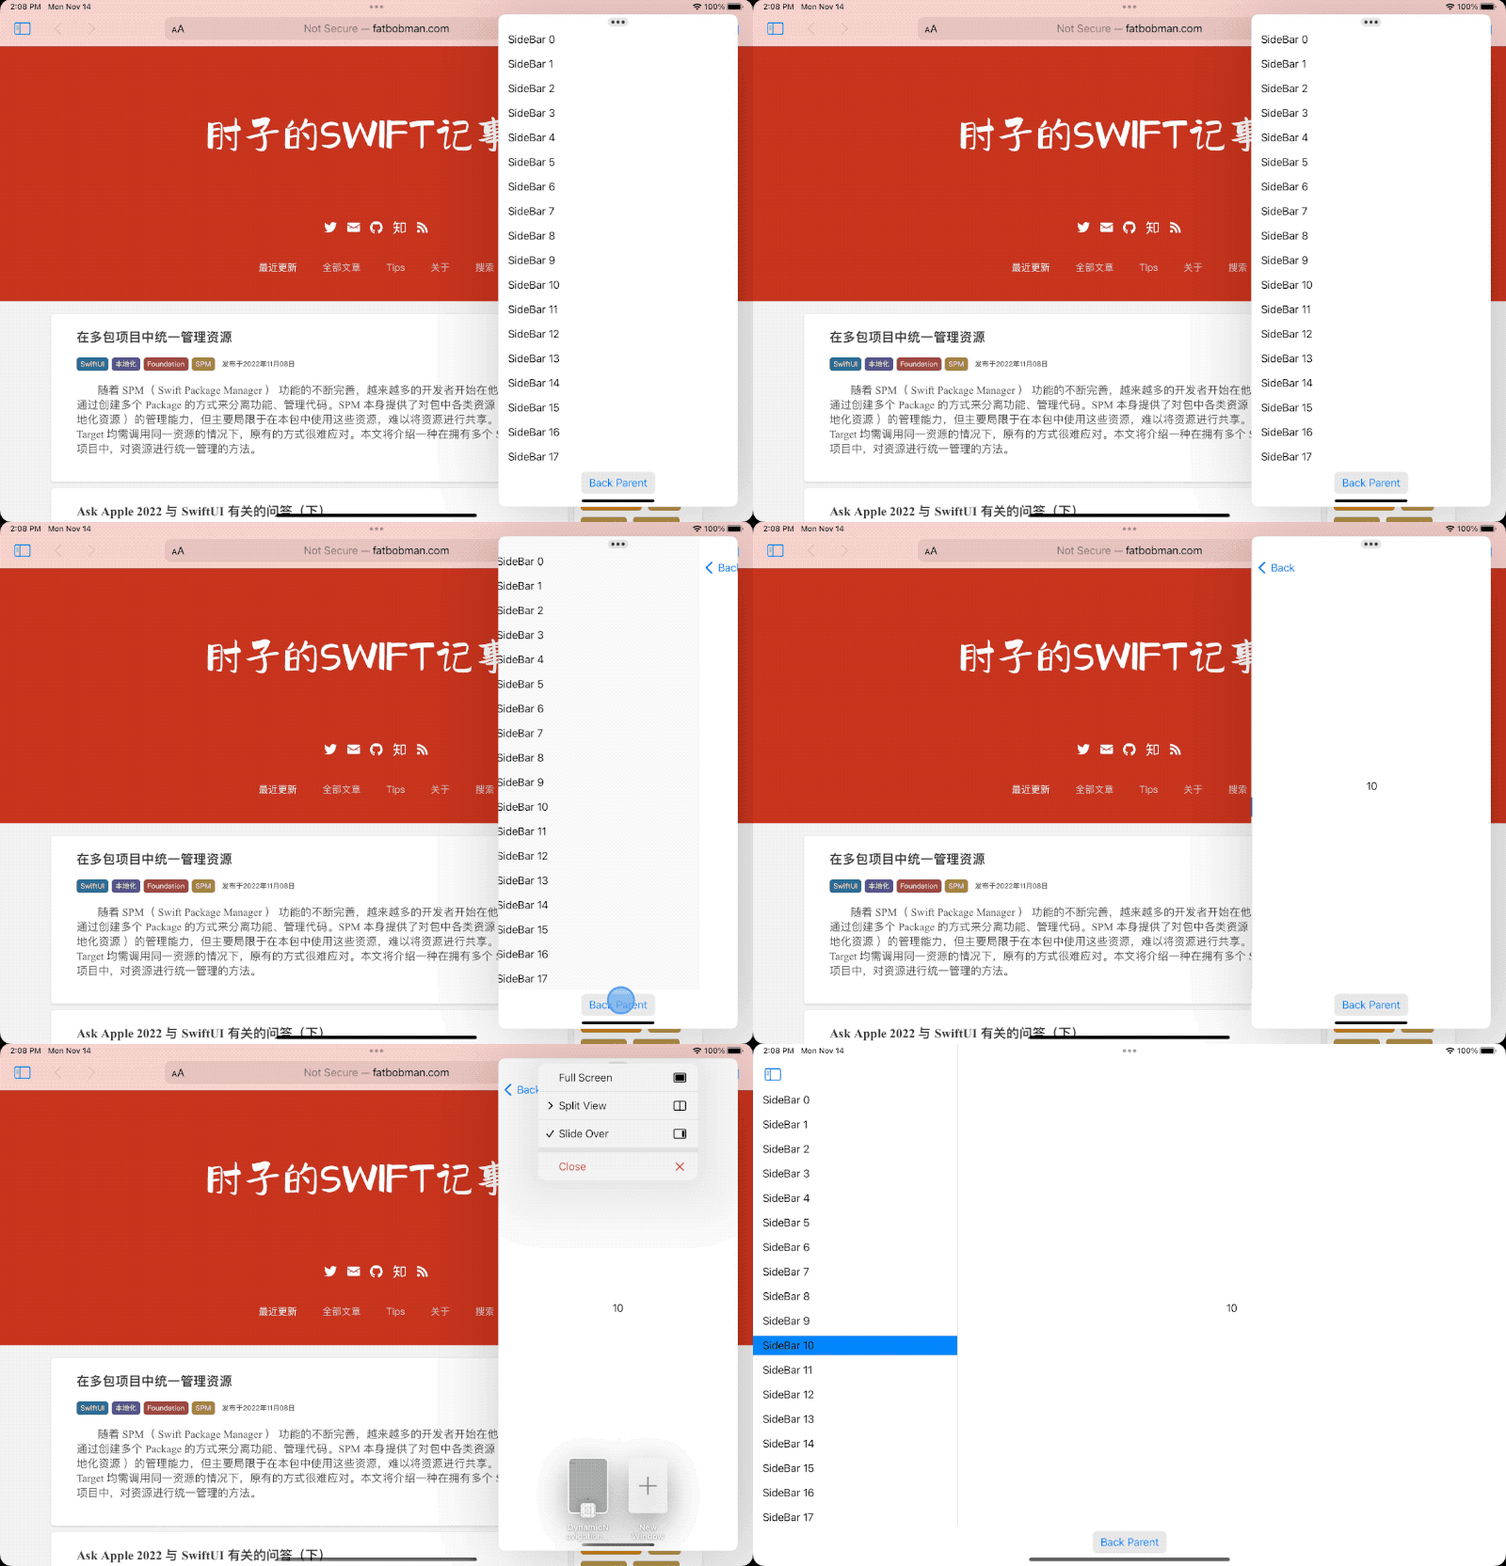
Unfortunately, due to the lack of an exposed path interface, navigationDestination(for:) in the Q&A cannot achieve programmatic backtracking. However, we can achieve a similar effect by using another navigationDestination(isPresented:) modifier. As the saying goes, you can’t have your cake and eat it too. For now, this approach can only support two columns, and we have not yet found a way to continue using programmatic navigation in the middle column.

class TwoStore: ObservableObject {
    @Published var detailID: Int?

    func backParent() {
        detailID = nil
    }
}

struct TowColumnsView: View {
    @StateObject var store = TwoStore()
    @State var visible = NavigationSplitViewVisibility.all
    var body: some View {
        VStack {
            NavigationSplitView(columnVisibility: $visible, sidebar: {
                ScrollView {
                    LazyVStack {
                        ForEach(0..<100) { i in
                            Text("SideBar \(i)")
                                .padding(5)
                                .padding(.leading, 10)
                                .frame(maxWidth: .infinity, alignment: .leading)
                                .background(store.detailID == i ? Color.blue : .clear)
                                .contentShape(Rectangle())
                                .onTapGesture {
                                    store.detailID = i
                                }
                        }
                    }
                }
                .navigationDestination(
                    isPresented: Binding<Bool>(
                        get: { store.detailID != nil },
                        set: { if !$0 { store.detailID = nil }}
                    ),
                    destination: {
                        // A separate struct is required to construct the view
                        DetailView(store: store)
                    }
                )
            }, detail: {
                Text("Empty")
            })
            Button("Back Parent") {
                store.backParent()
            }
            .buttonStyle(.bordered)
        }
    }
}

struct DetailView: View {
    @ObservedObject var store: TwoStore
    var body: some View {
        if let detailID = store.detailID {
            Text("\(detailID)")
        }
    }
}
It should be noted that, due to being in different contexts, a separate struct must be used to create the view in the destination of navigationDestination. Otherwise, the view will not respond to state changes.
NavigationSplitView + NavigationStack: The Most Complex but Most Effective Solution
If the above two solutions still do not meet your needs, you need to selectively call NavigationStack or NavigationSplitView based on the current visual size mode.
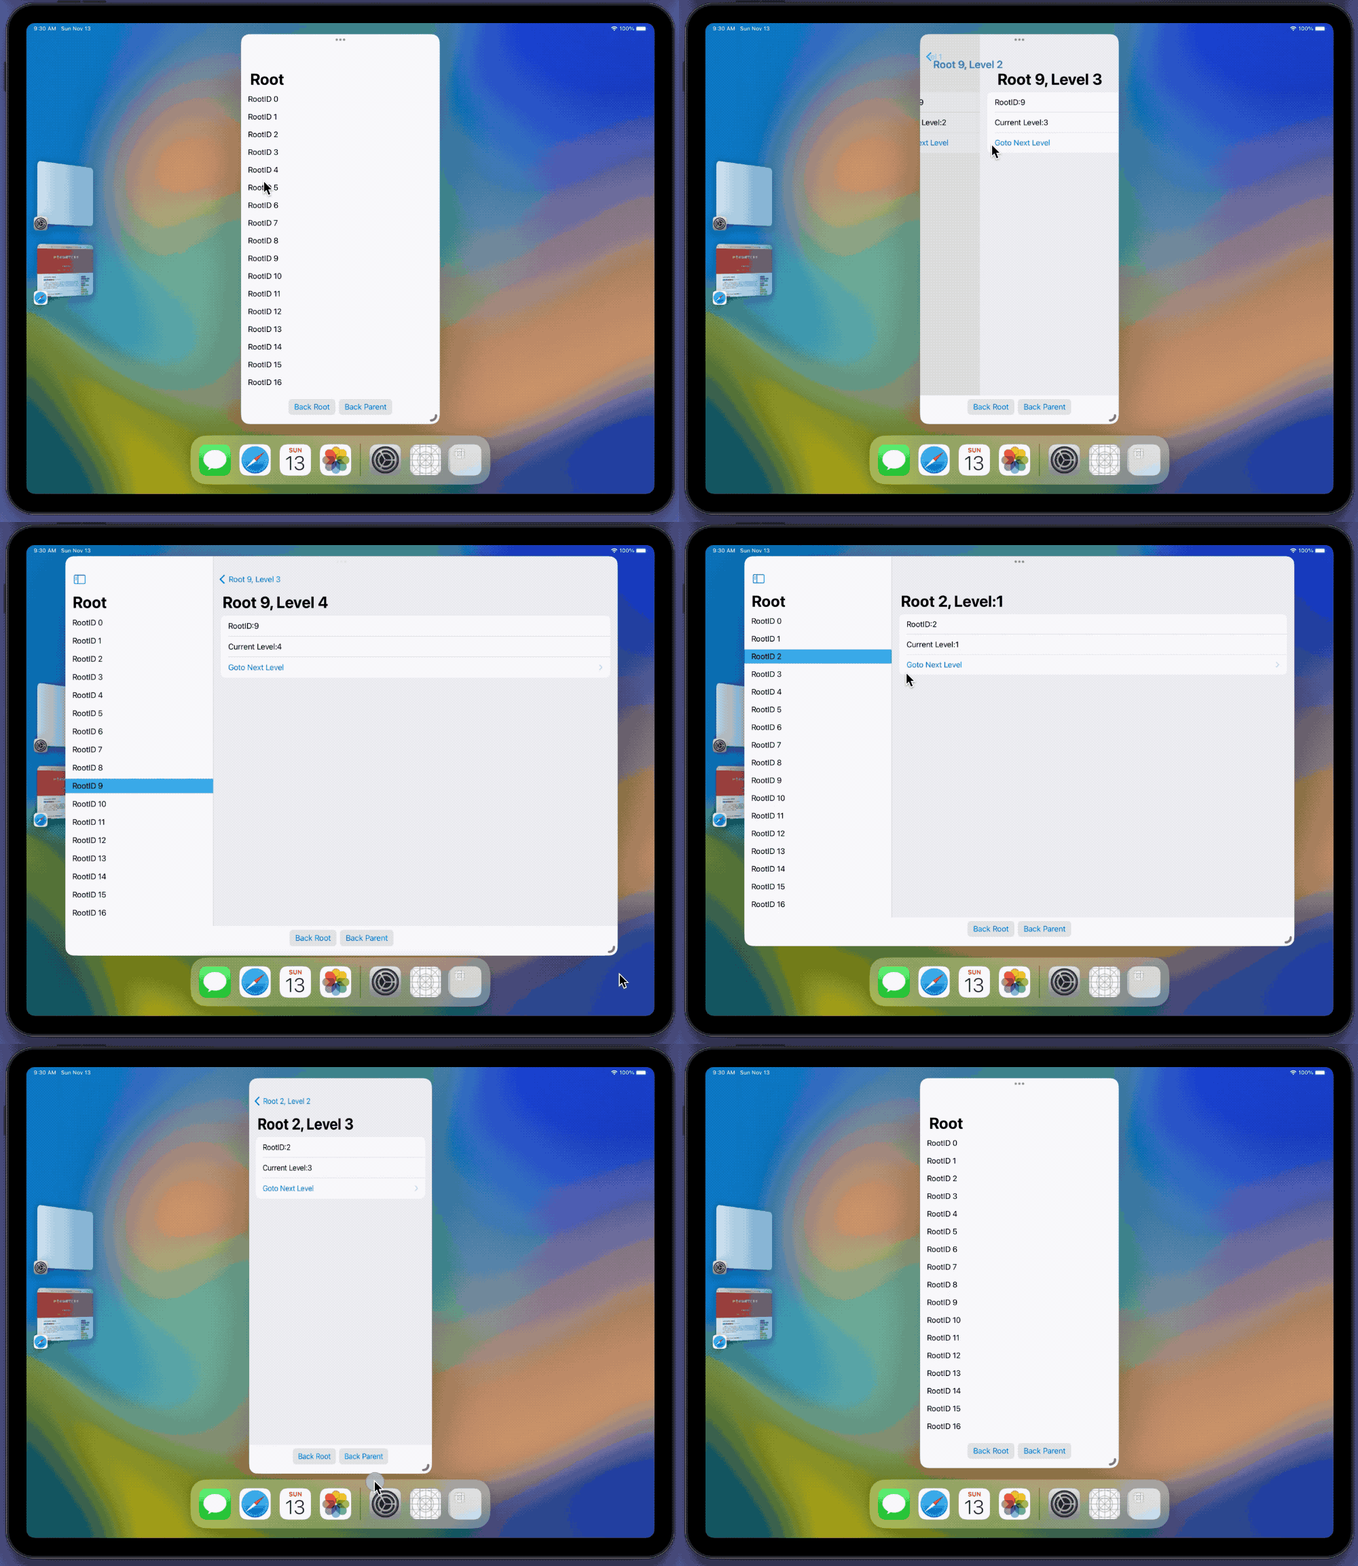
For example, the following code implements a NavigationSplitView with two columns, with a NavigationStack in the Detail column. After the InterfaceSizeClass changes, the navigation state needs to be adjusted to match the requirements of NavigationStack. The same is true in reverse. See the first animation in this article for a demonstration.
class AdaptiveStore: ObservableObject {
    @Published var detailPath = [DetailInfo]() {
        didSet {
            if sizeClass == .compact, detailPath.isEmpty {
                rootID = nil
            }
        }
    }

    @Published var rootID: Int?
    var sizeClass: UserInterfaceSizeClass? {
        didSet {
            if oldValue != nil, oldValue != sizeClass, let oldValue, let sizeClass {
                rebuild(from: oldValue, to: sizeClass)
            }
        }
    }

    func backRoot() {
        detailPath.removeAll()
    }

    func backParent() {
        if !detailPath.isEmpty {
            detailPath.removeLast()
        }
    }

    func selectRootID(rootID: Int) {
        if sizeClass == .regular {
            self.rootID = rootID
            detailPath.removeAll()
        } else {
            self.rootID = rootID
            detailPath.append(.init(level: 1, rootID: rootID))
        }
    }

    func rebuild(from: UserInterfaceSizeClass, to: UserInterfaceSizeClass) {
        guard let rootID else { return }
        if to == .regular {
            if !detailPath.isEmpty {
                detailPath.removeFirst()
            }
        } else {
            detailPath = [.init(level: 1, rootID: rootID)] + detailPath
        }
    }
}

struct DetailInfo: Hashable, Identifiable {
    let id = UUID()
    let level: Int
    let rootID: Int
}

struct AdaptiveNavigatorView: View {
    @StateObject var store = AdaptiveStore()
    @Environment(\.horizontalSizeClass) var sizeClass
    var body: some View {
        VStack {
            if sizeClass == .regular {
                SplitView(store: store)
                    .task {
                        store.sizeClass = sizeClass
                    }
            } else {
                StackView(store: store)
                    .task {
                        store.sizeClass = sizeClass
                    }
            }
            HStack {
                Button("Back Root") { store.backRoot() }
                Button("Back Parent") { store.backParent() }
            }
            .buttonStyle(.bordered)
        }
    }
}

struct SplitView: View {
    @ObservedObject var store: AdaptiveStore
    var body: some View {
        NavigationSplitView {
            SideBarView(store: store)
        } detail: {
            if let rootID = store.rootID {
                NavigationStack(path: $store.detailPath) {
                    DetailInfoView(store: store, info: .init(level: 1, rootID: rootID))
                        .navigationTitle("Root \(rootID), Level:\(store.detailPath.count + 1)")
                        .navigationDestination(for: DetailInfo.self) { info in
                            DetailInfoView(store: store, info: info)
                                .navigationTitle("Root \(info.rootID), Level \(info.level)")
                        }
                }
            } else {
                Text("Empty")
            }
        }
    }
}

struct StackView: View {
    @ObservedObject var store: AdaptiveStore
    var body: some View {
        NavigationStack(path: $store.detailPath) {
            SideBarView(store: store)
                .navigationDestination(for: DetailInfo.self) { info in
                    DetailInfoView(store: store, info: info)
                        .navigationTitle("Root \(info.rootID), Level \(info.level)")
                }
        }
    }
}

struct DetailInfoView: View {
    @ObservedObject var store: AdaptiveStore
    let info: DetailInfo
    var body: some View {
        List {
            Text("RootID:\(info.rootID)")
            Text("Current Level:\(info.level)")
            NavigationLink("Goto Next Level", value: DetailInfo(level: info.level + 1, rootID: info.rootID))
                .foregroundColor(.blue)
        }
    }
}

struct SideBarView: View {
    @ObservedObject var store: AdaptiveStore
    var body: some View {
        ScrollView {
            LazyVStack {
                ForEach(0..<30) { rootID in
                    Button {
                        store.selectRootID(rootID: rootID)
                    }
                label: {
                        Text("RootID \(rootID)")
                            .padding(5)
                            .padding(.leading, 10)
                            .frame(maxWidth: .infinity, alignment: .leading)
                            .contentShape(Rectangle())
                            .background(store.rootID == rootID ? .cyan : .clear)
                    }
                }
            }
            .buttonStyle(.plain)
        }
        .navigationTitle("Root")
    }
}
Please note the following:
-
Use the horizontalSizeClass of the view where the navigation container is located as the judging criterion
InterfaceSizeClass corresponds to the visual size of the current view. It is best to use the sizeClass of the view where the navigation container is located as the judging criterion. For example, in the Side Column view, horizontalSizeClass is always compact regardless of the environment.
-
Use the appearance time of the navigation container (onAppear) as the starting point for rebuilding the state
During the process of sizeClass changing, the value may change repeatedly. Therefore, whether the value of sizeClass has changed should not be used as the judging criterion for rebuilding the state.
-
Don’t forget that the root view of NavigationStack is not in its “stack” data
In this example, when switching to NavigationStack, the view declared in the Detail Column needs to be added to the bottom of the “stack”. Conversely, it should be removed.
Adhering to the principle of “one case, one proposal”, the current solution can be used to convert any navigation logic.
Summary
You can get the complete code of this article here.
One of the important features of SwiftUI is that it can correspond to multiple devices with one code writing. Although there are still some shortcomings, the new navigation mechanism has made great progress in this aspect. The only regret is that it only supports iOS 16+.